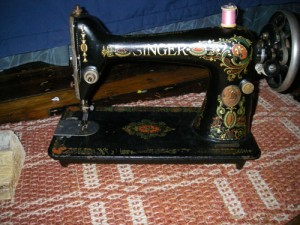
Recently we bought a Singer model #66 treadle sewing machine manufactured in 1918 and a treadle from a lovely lady in town. After buying the machine she served us lemonade in her garden and we chatted for quite a while. What a nice way to do business.
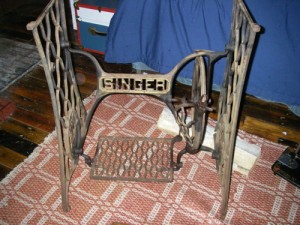
The machine was perfectly tuned but the treadle was rusty and frozen after sitting outdoors for some time, and it had no tabletop. The project of cleaning up the treadle, building a tabletop (with a hole to fit the machine into) and linking the two with a leather belt seemed a bit daunting.
One sunny day I set out my tools on the beach to work on the treadle thinking I would dismantle the whole thing, paint it, and then reassemble it. After a liberal dose of Liquid Wrench, the mechanism freed itself easily and the treadle ran smoothly in less than ten minutes. Unfortunately the bolts holding the works together did not want to loosen no matter how much lubrication, elbow grease and banging I applied. So, since it was running well, I decided to paint it as it was.
The spray painting was easy on another windless sunny day. I was pleased with the difference it made. Well worth the effort. The gold highlights on the designs and lettering will wait for a winter day by the fire when I can take my time with the detail.
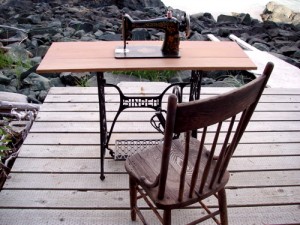
It took some research and decision making to plan out the tabletop. I wanted to use boards already on hand, so the dimensions depended on was available. I really wanted drawers on the sides, but needed to have the machine usable sooner than that project would allow. They could be another winter project.
Finally I just started sawing and sanding. I used two long boards on either side of two short boards, butting them together with a machine-sized hole in the center. I fastened them on the bottom with screws and narrow boards. I had to chisel out two hollows for the hinges and cut some belt holes. Later I plan to use the router to trim the edges and make it look nice. The wood will also need sealing.
I installed the belt and threaded the machine to try it out. I found that a part of the tension mechanism needed replacing. Fortunately the lady we bought the machine from had ordered that part, but had never installed it. I did some Internet research and actually found a manual for the machine. After several tries I got it working and began re-learning to treadle. I had learned once as a child at my Grandmother’s house. Several sewn up rags later I felt comfortable enough to do a real project.
Now I am nearly done with a nightshirt for Mark made from a Victorian shirt pattern. It’s fun to work on the sewing while we listen to an audio book. I love my “re-tread” sewing machine.


Good News! We have two drawers for the sewing machine from Grandma Harris! We talked about those drawers a couple days ago, wondering if we’d ever find a good use for them. Imagine, we have saved them all these years just for you. LOL
Wow, thanks Mom! That would make this even more special! I can’t wait.
by chance do you have the manual? can you tell me how to set the tension?
Hi Beverly,
I downloaded the manual as a PDF from the Singer website. It is a little hard to see the diagrams so the actual threading of the machine is not clear. I think I finally have it figured out. The manual does describe how to set the tension and does it better than I could. See: http://www.singerco.com/support/model_number.html to find the best manual for you.
Thanks for visiting our blog. Happy sewing!
Michelle