
It has often been said that the best way to learn something is to teach it to someone else. For a long time, I’ve wanted to fully learn a particular knot that would be a very useful one in my life. Perhaps, by sharing it here on the blog, I’ll come closer to that goal.
The constrictor knot is a very simple knot that holds extremely well. It will not come loose on its own, and, if pulled too tightly, may not come off at all! It’s very useful for closing bags, securing bundles, seizing rope ends, and many other jobs. My most trusted knot guru, Brion Toss, (see The Homestead Reference Library: The Complete Rigger’s Apprentice) says “to know this knot is to constantly find uses for it” and says that it can do almost anything a hose clamp will do. That’s impressive!
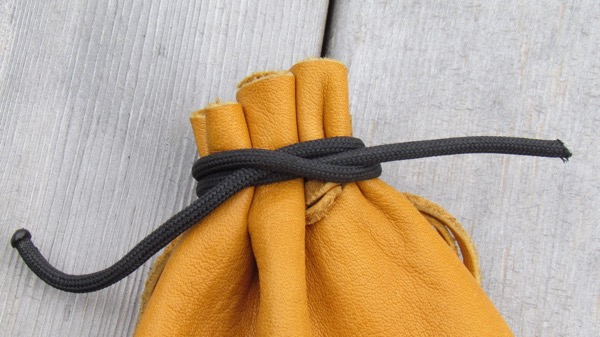
A constrictor knot closing a bag (Photo: Mark A. Zeiger).
My problem, as I’ve mentioned elsewhere on the blog (see Know Your Knots) comes from learning the knot and using it enough to remember it each time it’s needed. Somehow, for this knot, that has proven rather difficult, even though it’s incredibly simple.
As with any knot I try to learn, I consult at least three of my knot books, including Toss’s book, and try to find the method that works best for me. Toss shows a simple way to make the knot by twisting a loop. Yet, for whatever reason, none of these methods has clicked for me.
Eventually, I figured out my own simple method of tying the knot, far simpler even than Toss’s, which I will now pass on to you:
- Hold one end of a length of line between thumb and index finger so that the end angles upward and toward your palm.
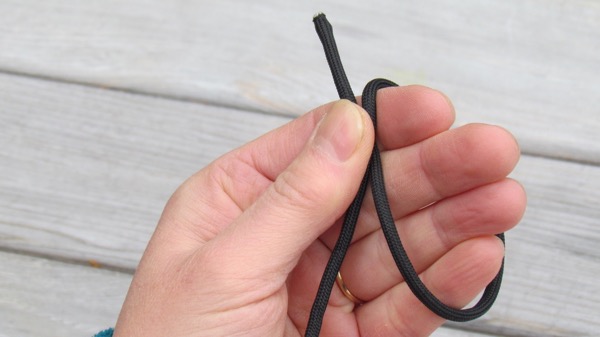
(Photo: Mark A. Zeiger).
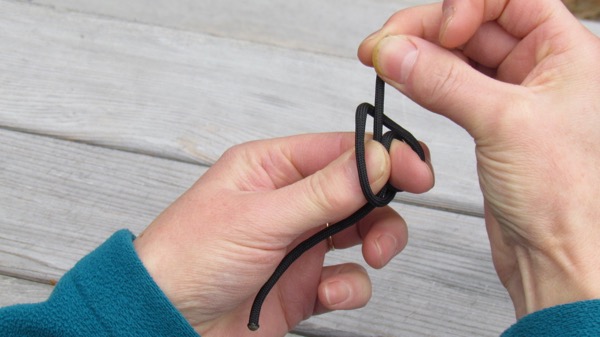
- Loop other end of line under your index finger and over the top, forming an X of line under your thumb. Make the loop loosely, with extra line under your finger. Note: I use finger singular, although I tend to tie this over two fingers, to give me more room to work with then the knot is complete!
- Pinch the loop with the thumb and forefinger of your other hand; twist it one turn (clockwise or counterclockwise doesn’t seem to matter, both work!) and loop it over the end of your finger, and loop it over the line end, which angles upward.

(Photo: Mark A. Zeiger).
(Photo: Mark A. Zeiger).
- Gently pull ends tighter on your finger to form the knot.
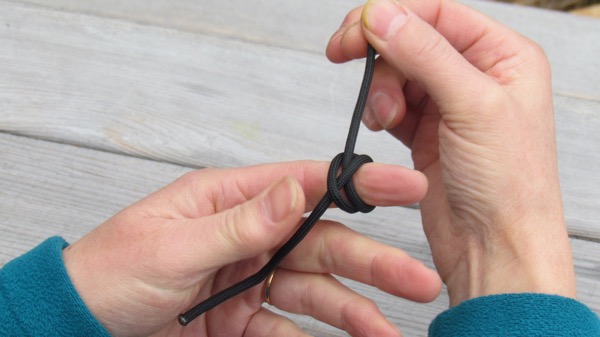
(Photo: Mark A. Zeiger).
- Slip off your finger, loosen as needed, but be sure to keep it held in configuration, or your knot might “capsize.” Slip the knot over a sack mouth or other task requiring the knot. Pull tight to secure.
The irony here is that even though I’d figured out this process, I also had to learn the “regular” method of tying the knot well enough that I could check my work and ensure that the knot I tie with my method is, in fact, a constrictor knot. I believe it is; my finished knot appears to be a mirror image to one tied “properly,” but in practice it seems to retain all the qualities of a good constrictor knot.