
Lately, friends have been sharing a link on Facebook to a site that sells beeswax food wrappers. We decided we’d better write about how to make your own.
Beeswax food wrappers can take the place of plastic cling wrap or aluminum foil. They offer the clinging/molding qualities of each while being reusable. The beeswax in the cloth clings to itself (like cling wrap) molds somewhat rigidly, similarly to aluminum foil. The beeswax contains and restricts moisture and odors. It’s all natural, reusable, reduces household waste, and adds an interesting decorative flair to the kitchen.
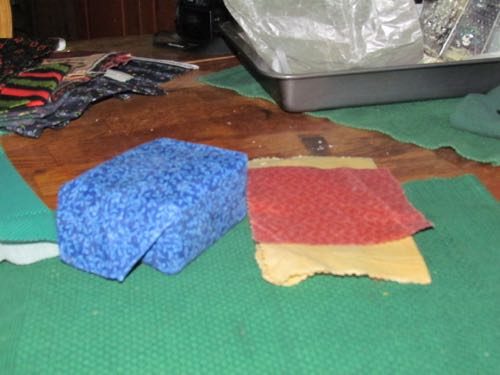
Beeswax wraps on a block of cheese (l) and smaller jobs. The one on top fits under a ring to seal a jar (Photo: Mark A. Zeiger).
Michelle started making these last year, first for personal use, but soon for family Christmas presents.
They’re very useful, eco-friendly, and extremely easy to make. Here’s how:
Here’s what you’ll need for the project:
- Pieces of cotton fabric in useful sizes. “Quarters” of quilting fabric work well if you have no scraps available around your house. Quarters will be cheaper than buying a whole yard of bolt cloth.
- Cookie sheet or other baking pan
- Pinking shears
- Beeswax
- Grater
- Spoon, spatula, stick, or other spreading tool
Use 100% cotton cloth, which will fully absorb wax. Check content if necessary by burning a scrap of it. If it smells like burning hair, it’s wool or silk. If it melts and/or smells like burning plastic, it’s synthetic. If it smells sweet and burns to ash, it’s cotton.
Cut cloth to size, depending on use from jar lid toppers to bricks of cheese, or bowl covers. Our largest are about 18 inches (1/2 yard) square. Cut with pinking shears to reduce fraying. If your pinking shears are dull, you can trim the cloth edges after waxing, when they are more rigid.
Grate beeswax. We use an old, broken cheese grater, just for the convenience of never needing to clean it for other projects. Be careful when moving the grated wax, as it tends to cling to whatever you put it on!
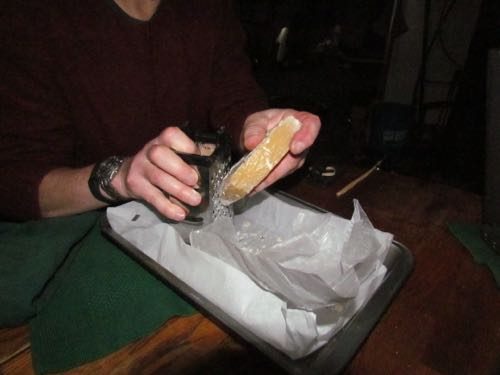
Grating the beeswax (Photo: Sarah A. Zeiger).
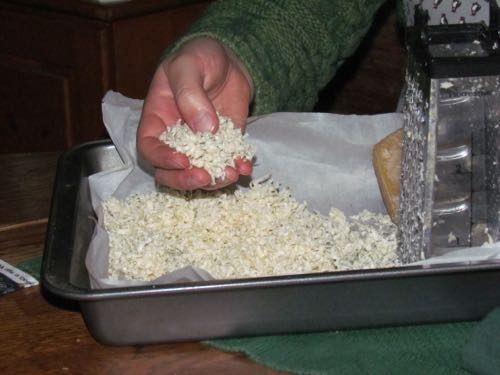
Grated beeswax. Michelle estimates about a cup to coat two large cloths (Photo: Mark A. Zeiger).
Sprinkle grated wax on pan, lay cloth in the pan and spread more wax on top of it. If necessary or convenient, cloths can be layered, either to fully saturate a cloth in a small pan, or to wax several cloths at the same time.
More wax makes a stiffer cloth with better self clinging ability. Less wax makes them more pliable, but possibly less clingy.
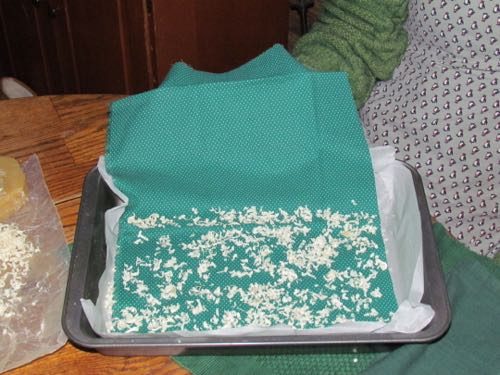
First layer of wax under the cloth, second inside fold (Photo: Mark A. Zeiger).
Note that your pan doesn’t need to be large enough to hold your biggest cloth piece flat. In the photos, you’ll see that we use a cake pan with wax paper in the bottom. We’re simply continuing to use an old, ruined pan; the wax paper protects the cloths from the damaged cooking surface.
Place in warm oven, at about 150° F, or on top of your wood stove so grated wax melts into the cloth. We don’t recommend heating it on top of a conventional stove, as that could lead to fires.
At this low heat, there’s little fire danger—the pan is generally cool enough pull out of the stove with bare hands.
However, watch carefully! Beeswax, like any other wax, is highly flammable, and if left unattended or heated too long, might burst into flames! For added safety, create a double boiler effect by placing your pan in another, larger pan filled with water. Let the hot water melt the wax rather than the heat of the stove alone.
Watch for melted wax to saturate the cloth. This takes about 10 minutes or so. If the wax puddles, use a spatula or other tool to spread it around on the cloth. Add additional grated wax if necessary.
The wax will solidify as you remove the pan from the oven, and the cloth from the pan. Hang the wax-saturated cloth on an old hangers a few minutes if necessary. When cool, fold as convenient, or use immediately.
The cloth should be translucent when the wax dries. If you see clumps of wax on it, throw it back in for further melting. Clumps or thick layers of wax will flake off in use.
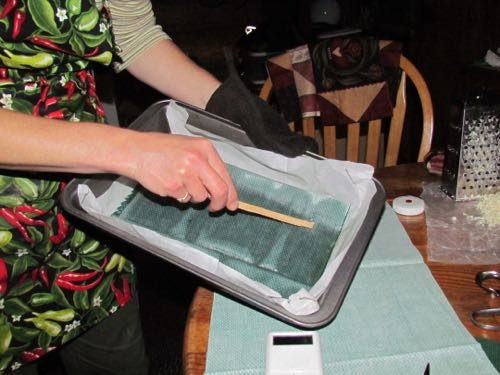
Michelle spreads melted wax around cloth with a stick (Photo: Mark A. Zeiger).
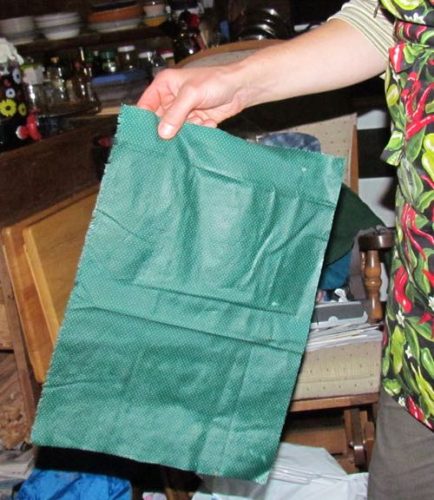
A completed beeswax food wrap, ready to use (Photo: Mark A. Zeiger).
Use them as you would cling wrap or foil. The warmth of your hands softens the wax to make it cling as you shape it around the object.
After each use, wash with soap and cold water, or simply give each cloth a quick dunk and swish in dishwater, rinse, and dry.
Eventually, the wax will wear away through use, particularly where on folds. Cloths can be rejuvenated by repeating the waxing process, using less wax than when they were first created, as the remaining wax will melt and redistribute in the process. If they can’t be revived, use them as fire starter, or compost them, and make more!
This sounds interesting and I thought I’d make some until I saw all the work involved. However a sheet or two would be welcomed as a Christmas gift!
Wow, great idea! Thanks, Mom!